Hello internet sorry about my last post one of my friends thought it was funny to do that. Now let's get to business. My plan is now complete so I can begin with constructing (sounds fancier than making) my logo. There is only one problem but; my lack of drawing skills.
I do struggle to draw even the most basic shapes so at first I had no idea how I would manage to draw the headset and joy stick. I thought, "Too bad I can't just trace it." Then the solution to my problem hit me. Why don't I just trace it? But how could a trace it on Inkscape? After some thinking the solution to my problem had once again revealed its self. I would need to import the image I used in the planning blog post into Inkscape. With this image now in Inkscape I could, in theory, just draw on top of it. I then decided to give this a go and this is what happened.
I did manage to import the image of the joy stick into Inkscape which meant that my plan was already working. To do this I clicked on the 'File' drop down menu and found the 'Import' button. I then had to find my desired image but before I could locate it I needed to click the 'Files of type' drop down menu and then click 'All images'. This allowed me to see my jpeg but it would also work with gifs or any other type of image. I then pressed on okay and was faced with message asking if I wanted to link or embed the image. I chose embed so the jpeg would be in the Inkscape file so if I deleted the image by accident it would still be in my Inkscape file.
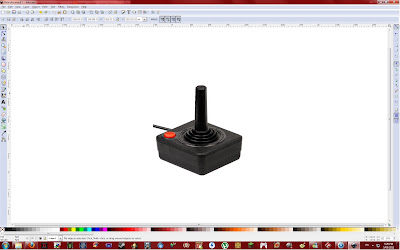 |
| A bit big but at least it is in there |
Now with my image ready I could trace it with ease. I was wrong, very wrong. It was easier than drawing but there were still some problems that I needed to face. With the 'Draw bezier curves' tool selected I could now trace the joy stick which was great but I had to do it all in one go. If I made a mistake I would need to undo it which means that the whole line is deleted not just the end segment. I could just do a few bits than push enter to finish the line but then to continue from that spot I would need to click on the very end and that would have proven to be very difficult. After trying a couple more times I realised that I was completely wrong. I could just do a little section then push enter and then continue the line. I would just need to click the end white box and the line would continue like so.
After a few lines here I ended up with this.
After making these lines I needed some way to edit them because a few of them were not fully connected. I remembered from my previous blog post (the pacman one) that you could edit things through the use of nodes. So I thought, "Might as well try to see if it will work". I then clicked on the 'Edit path by nodes' tool and clicked on my drawing and it worked. I could now move my lines around with ease but I did find that moving them with the mouse or the arrow keys did make it move too much. So to fix this I looked at the tool bar and found boxes labelled 'X' and 'Y'. Thanks to my Game and Web class I knew what those things meant. If I wanted to move it right I would have to add to the X and if I wanted it to move up I would have to add to the Y. To move in the other directions I would only have to do the opposite. With a bit of the joy stick traced and neat I could then move onto tracing the rest of it.
While tracing I discovered something that helped me draw straight lines. While using the 'Draw bezier curves' tool I saw near the bottom of my screen something that said 'Ctrl: snap to angle'. So while holding ctrl my line would, as the description suggests. snap to an angle. This then made it a lot easier to create straight lines.
After creating some nice straight lines I discovered something by accident. I was holding the ctrl button to create straight lines when I pushed the right mouse button. I zoomed in but at first I did know how I zoomed in I thought I just did it using some form of magic. Once this happened a few more times I realised that I must be doing something to zoom in. After some random clicks I finally realised that by holding Ctrl and pushing the right mouse button you zoom and if you hold Shift while doing this you zoom out. Finding this out was very useful because the tool you are using stays the same so you can zoom in/out while drawing lines.
Once I had finished tracing my joy stick I was faced with another problem.After grouping all my lines I tried to make the fill of the object red and this was when I had the biggest problem so far.
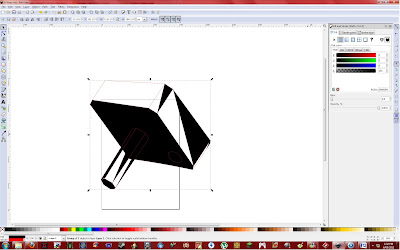 |
| Hey it looks like modern art |
Only certain parts of my object is painted black which is not what I wanted. I was confused on why only some parts could be filled while others could not. All the lines could have their colour changed so it must have been something that I did wrong. Then it hit me; I couldn't fill what wasn't there. With my lines I would draw about a line at a time, push enter and then move onto the next line. This meant that all I had were a bunch of different lines that were not connected but looked like it which then means that they did not form anything that could be filled. So to fix my problem I would have to trace my tracing but this time remember to make the lines connected, as I mentioned above towards the beginning of the post.
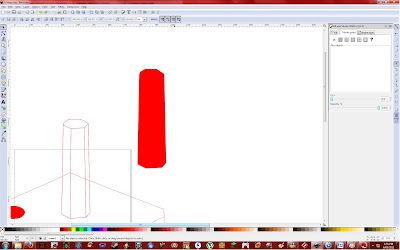 |
| It worked yay! |
|
This is what my end product looked like after I turned down the opacity of the object.
All in all I was very happy with what I managed to do and the problems I solved. I also think it looks pretty cool as well. Of course it was not a 100% carbon copy of the original but where is the fun in that. Now onto the head set.


No comments:
Post a Comment